The Mail app lets you send and receive emails from personal and professional contacts. You can create an Email Group in the Mail app to send bulk emails to a group of contacts simultaneously. But when you are on leave, you might not prefer to receive work-related emails.
You may miss out informing your contacts about your leave. The Mail app lets you send an automatic reply as an Out-of-Office message. This post will show you how to set up an Out of Office message in the Mail app on your Mac.
Set Up Out Of Office Message in Mail App
The Out of Office message is an automatic reply for your contacts trying to reach you while you are unavailable. You can set up an out-of-office reply in Apple Mail to keep your contacts informed about your absence. There are two ways of doing this in the Mail app on your Mac. However, we suggest installing the latest version of the Mail app before following the steps to avoid glitches.
Using Rules Feature
You can create rules in the Mail app on your Mac to effectively manage your emails. You can use this functionality to create automatic replies like an Out-of-Office message. The steps are higher in number, but the method is quite easy. Here’s how it goes.
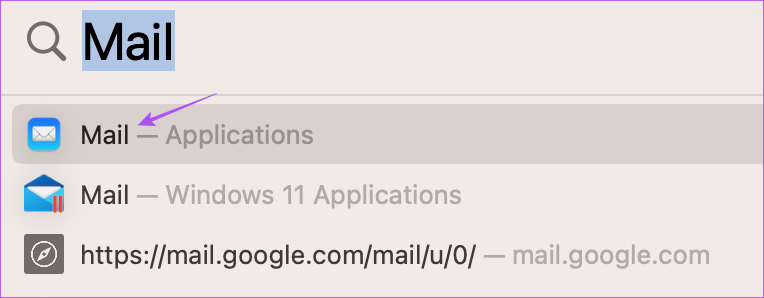
Step 1: Press Command + Spacebar keyboard shortcut to open Spotlight Search, type Mail, and press Return.
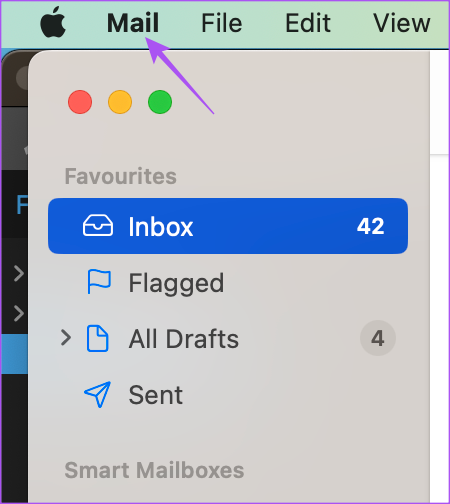
Step 2: Click on Mail at the top-left corner.
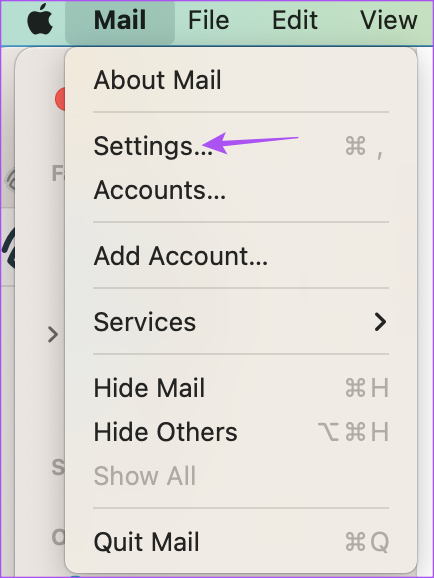
Step 3: Select Settings.
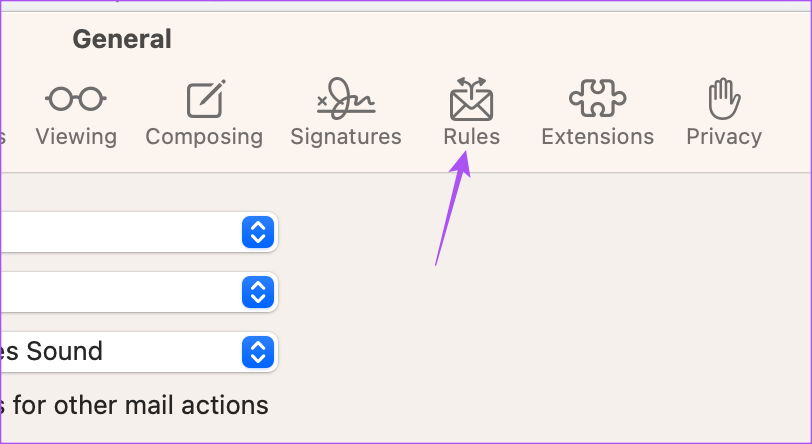
Step 4: Click the Rules tab in the General window.
Step 5: Click on Add Rule on the right side.
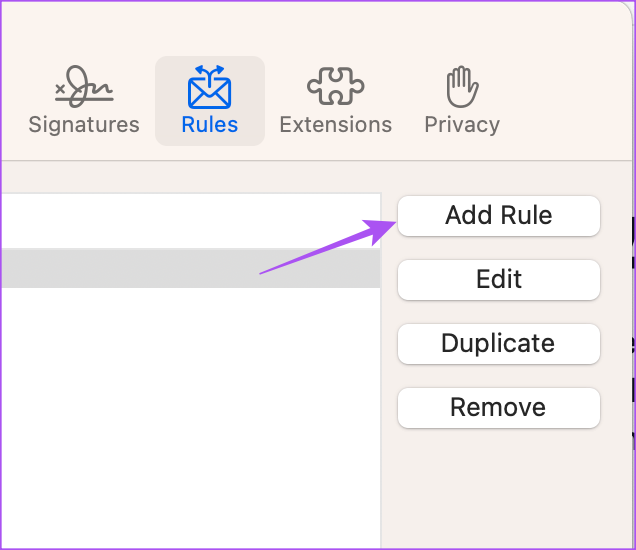
You will see different options to add your rule. We have to create one to set up an out-of-office reply in Apple Mail on your Mac.
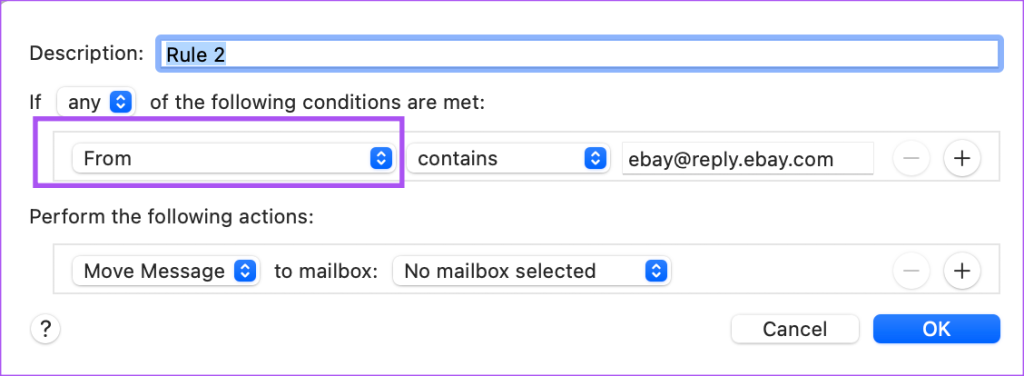
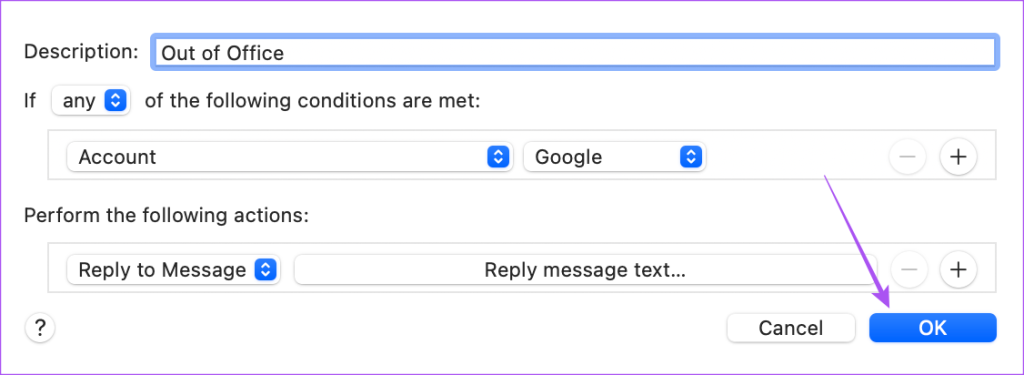
Step 6: Keep the default ‘Any’ section to ‘If the following conditions are met.’

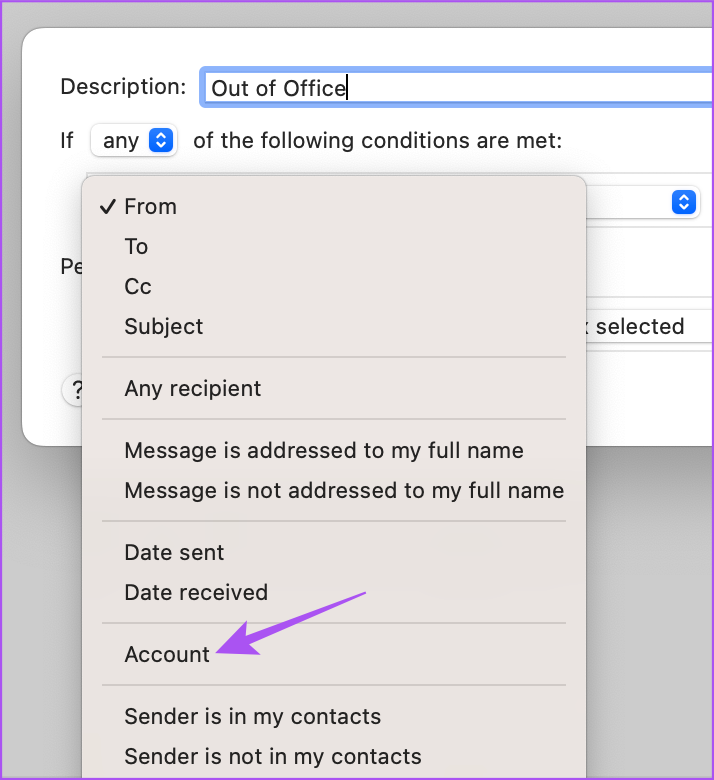
Step 7: To start with the initial condition, click the first dropdown menu.
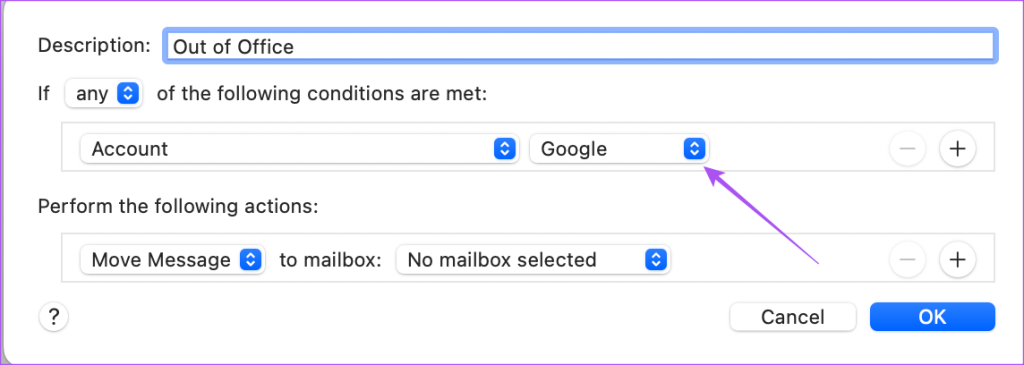
Step 8: Select Account.
Step 9: Select the email account that will send your out-of-office reply to your contacts.
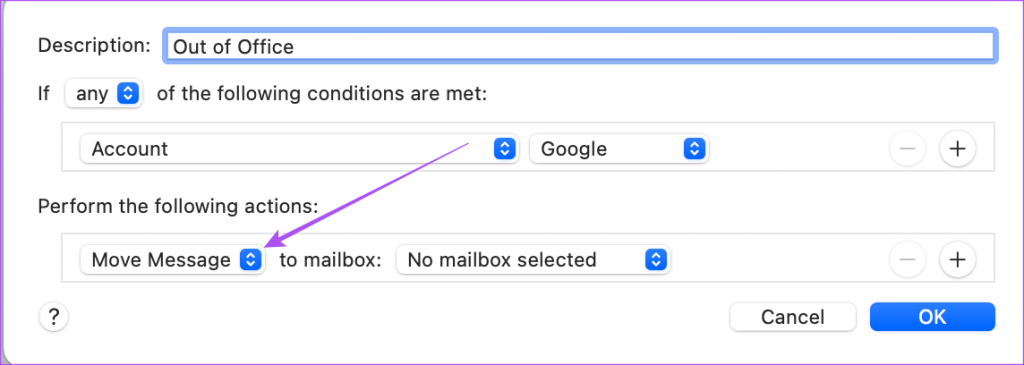
Step 10: Under ‘Perform the following actions,’ click the first drop-down menu.
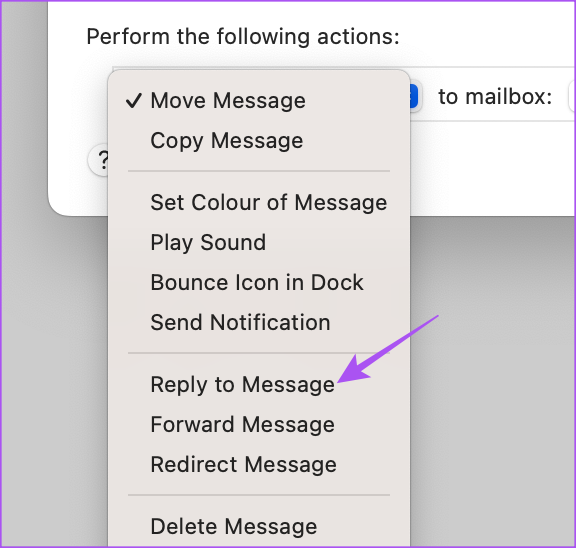
Step 11: Select Reply To Message.
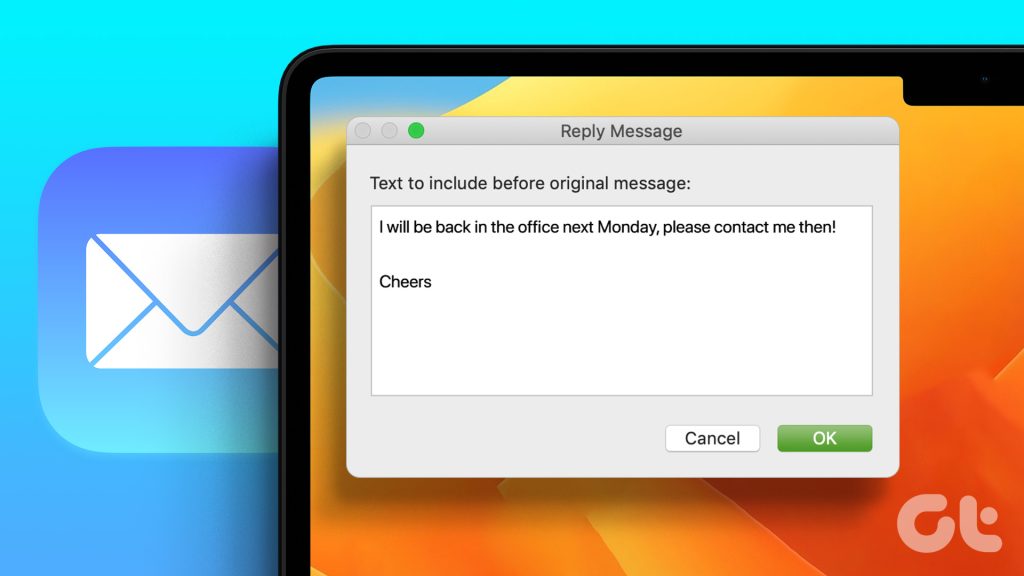
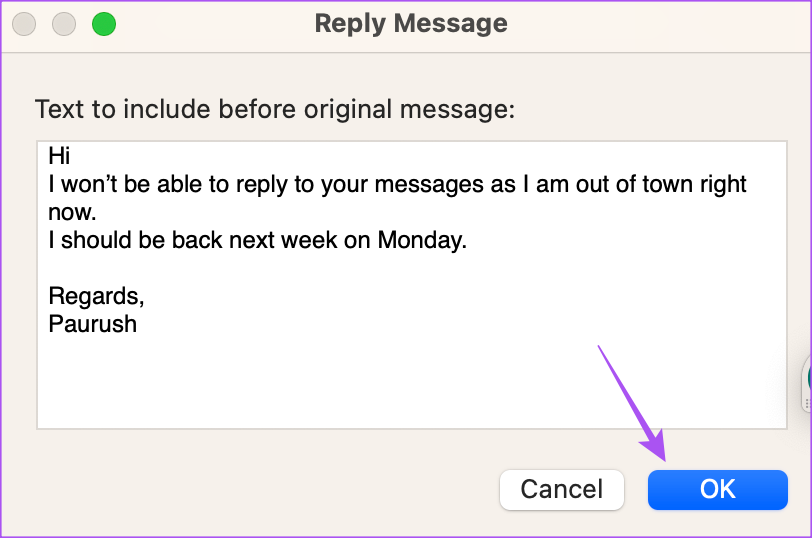
Step 12: Click on Reply Message Text.
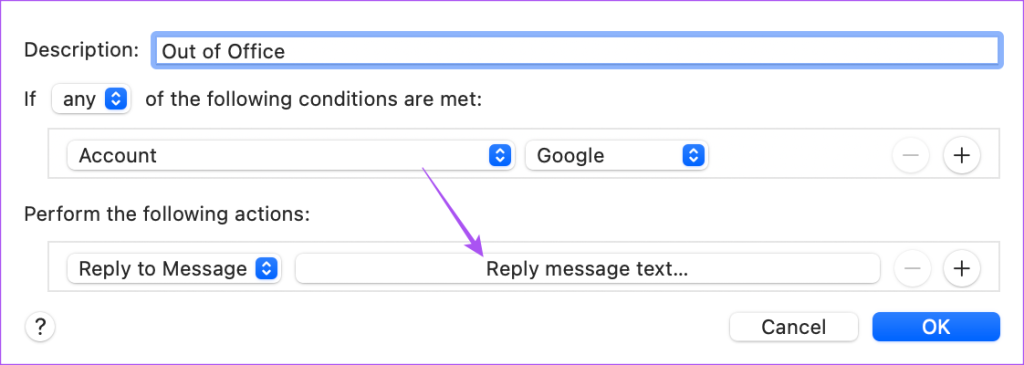
Step 13: Type your Out-of-Office message that will be dispatched and click Ok to confirm.
Step 14: Click on Ok again to confirm.
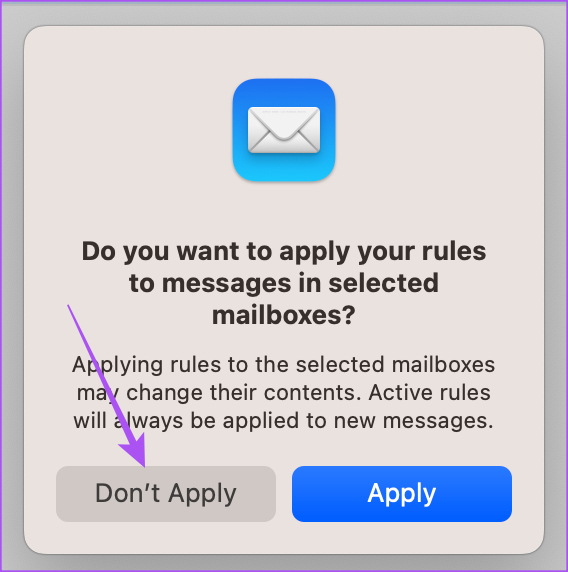
Step 15: Select Don’t Apply. Ensure that you do not select Apply as it will send the Out-of-Office message to all your current emails in the inbox.
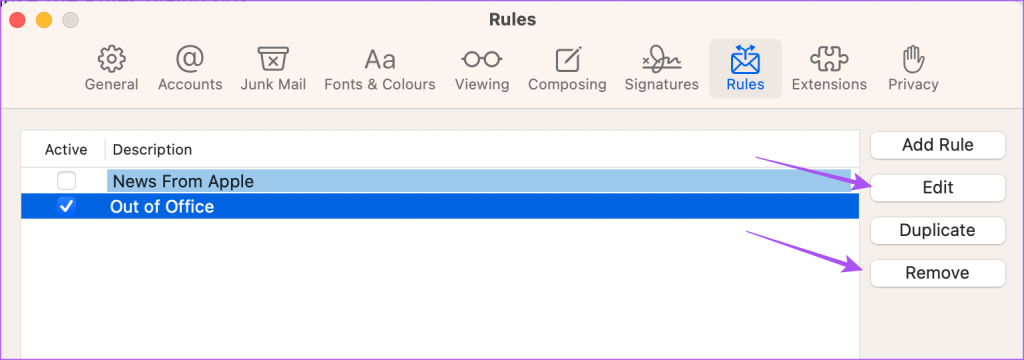
This is how you can create an Out-of-Office message in Mail app on your MacBook or iMac. The rule will be visible on your screen.
You also get the option to Edit or Remove the rule from your mailbox.
Using Inbox Settings
Alternatively, here’s how you can use the inbox settings of the Mail app to set up an out-of-office message on your Mac.
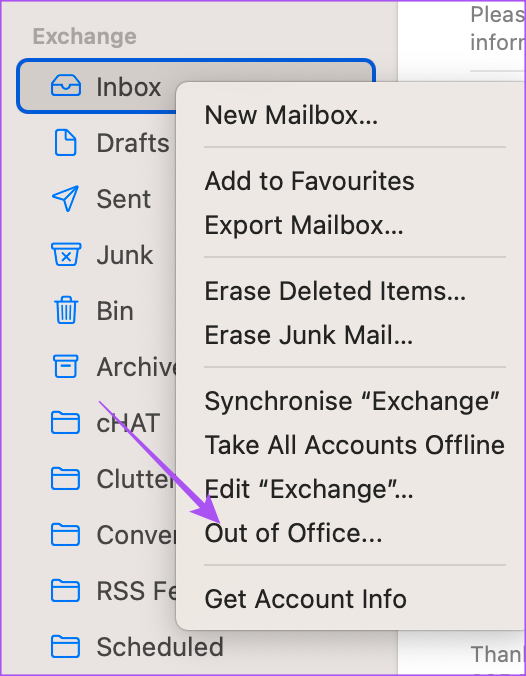
Step 1: Press Command + Spacebar keyboard shortcut to open Spotlight Search, type Mail, and press Return.
Step 2: Right-click on Inbox from the left menu.

Step 3: Select Out of Office.
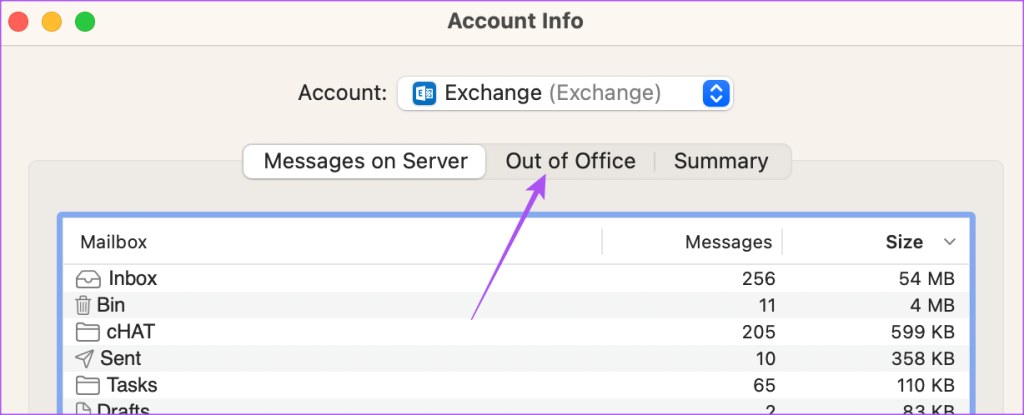
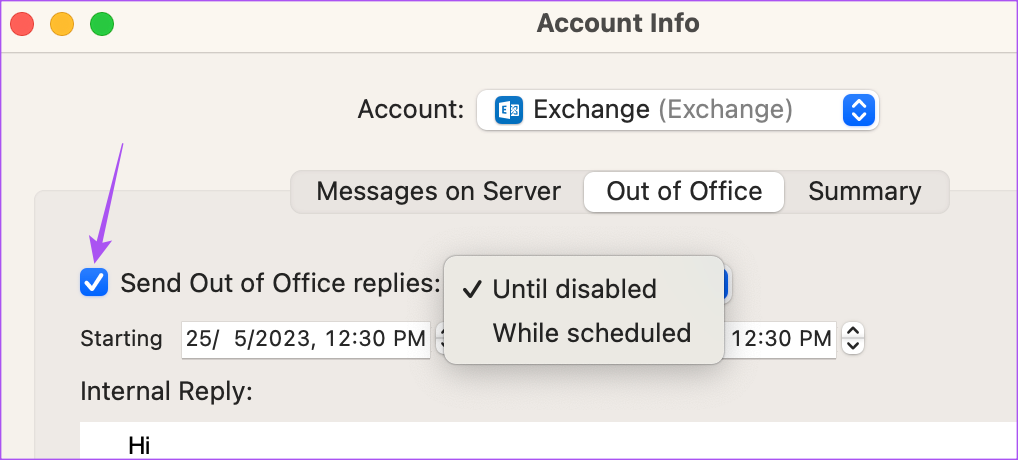
Step 4: Select the Out of Office tab in the Account Info window.
Step 5: Enable the option of ‘Send Out of Office replies.’
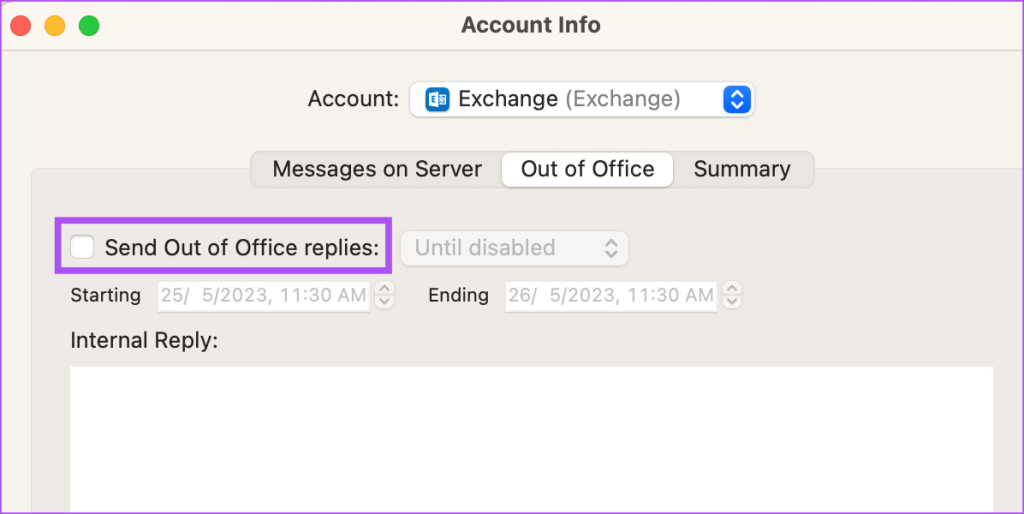
Step 6: Select the Start and End date and type your message.
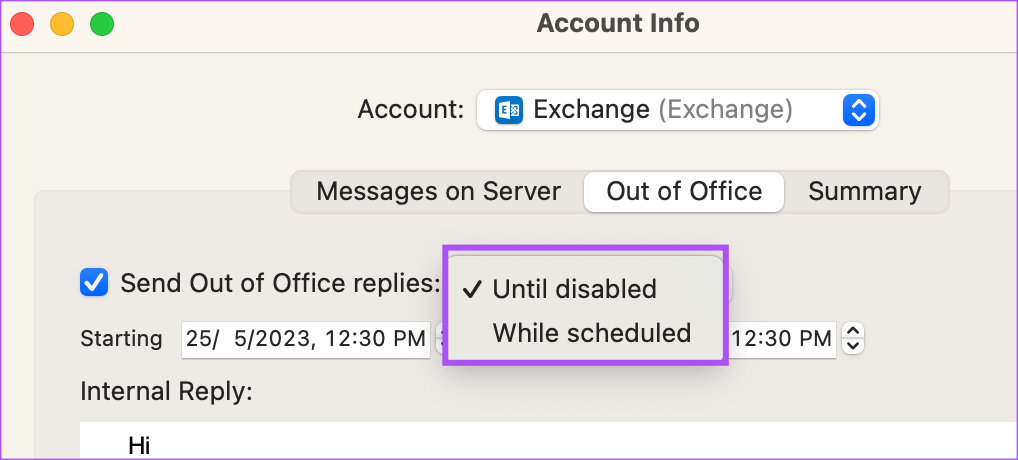
Step 7: Choose to send the message Until Disabled or While Scheduled from the drop-down.
To remove the Out of Office message, you can just click on the checkbox again to turn it off.
Enjoy Your Day Off
You can set up office messages in Mail App on Mac to avoid any delay in communication and keep everyone informed about your absence from work. You can follow the same steps for every email client, like Gmail, Outlook, and Yahoo in the Mail app. You can also sign in with your Microsoft Exchange account in the Mail app on your Mac. But some users complain that they see a blank body of messages in the Mail app. In case you are also facing the same, we have shared the best fixes for Apple Mail showing blank body for messages with Microsoft Exchange on Mac.
Last updated on 26 May, 2023
The above article may contain affiliate links which help support Guiding Tech. However, it does not affect our editorial integrity. The content remains unbiased and authentic.
Read Next
 Polaris Office vs WPS Office: Which Is the Best Free Office Suite on Android
Most of the Microsoft Office suite apps are available on Android.
Polaris Office vs WPS Office: Which Is the Best Free Office Suite on Android
Most of the Microsoft Office suite apps are available on Android.
 Outlook App vs Apple Mail: Which Is a Better iOS Mail App
Frankly, there are so many mail apps for the iOS platform that it can be difficult to zero in on one.
Outlook App vs Apple Mail: Which Is a Better iOS Mail App
Frankly, there are so many mail apps for the iOS platform that it can be difficult to zero in on one.
 Auto Save MS Office Documents to SkyDrive aka Office Web Apps
Our default understanding of a cloud storage desktop application is that we have to move files and folders (manually) to the application directory in order to synchronize them across computers
Auto Save MS Office Documents to SkyDrive aka Office Web Apps
Our default understanding of a cloud storage desktop application is that we have to move files and folders (manually) to the application directory in order to synchronize them across computers
 How to Set Out of Office Message in Microsoft Teams
If you're going on a leave, it's a good idea to set Out of Office notices for things beyond email.
How to Set Out of Office Message in Microsoft Teams
If you're going on a leave, it's a good idea to set Out of Office notices for things beyond email.
 How to Rename a Mail Account on Windows 8 Mail App
Windows 8 Mail is the new native email desktop client of Windows.
How to Rename a Mail Account on Windows 8 Mail App
Windows 8 Mail is the new native email desktop client of Windows.
 How to Schedule Out of Office Mail in Outlook
Everyone deserves a vacation or a small break from work life.
How to Schedule Out of Office Mail in Outlook
Everyone deserves a vacation or a small break from work life.
 How to Create and Apply Message Rules in Windows Live Mail
In the past we have talked about folder rules in MS Outlook and we also saw how that helped us stay more organized and automated with our emails.
How to Create and Apply Message Rules in Windows Live Mail
In the past we have talked about folder rules in MS Outlook and we also saw how that helped us stay more organized and automated with our emails.
 Deleting Attachmentsin Mac’s Mail App to Free Up Space
Do you own a Macbook Pro or Macbook Air from a few years ago?
Deleting Attachmentsin Mac’s Mail App to Free Up Space
Do you own a Macbook Pro or Macbook Air from a few years ago?
DID YOU KNOW
Google Duo was released in 2018.